1.4 Connect Using Public Key Authentication
This method requires some advanced settings being made prior to connecting.
- Create private/public keys pair
- Upload public key to the server
- Connect to the server using public key authentication method
Note:
Described settings may not work depending on the server configuration.
If you experience problems performing the steps below contact your system
administrator, or visit our support page at https://www.privateshell.com
Create private/public keys pair
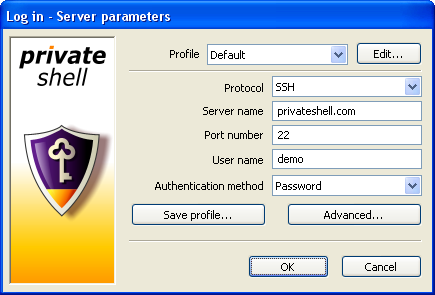
- Run Private Shell
- In the Server parameters box click Advanced
- Choose User keys settings
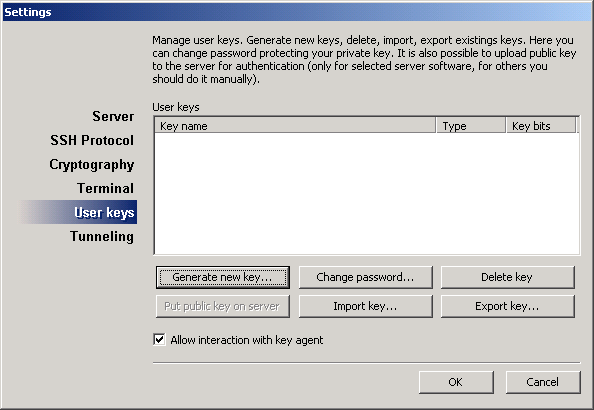
- Click Generate new key...
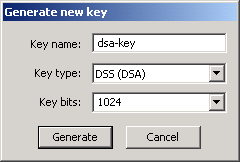
- Enter the Key name ("dsa-key")
- Click the Generate button
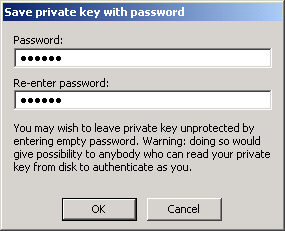
- In the Save private keys with password box enter a password for the key.
It is used to encrypt your private
key, so no one having access to the key file can use it. This password
is not associated with the password that is used for password authentication.
- It is recommended to create an RSA key too. Repeat from the 4th step but enter
another Key name ("rsa-key") and set the Key type to RSA
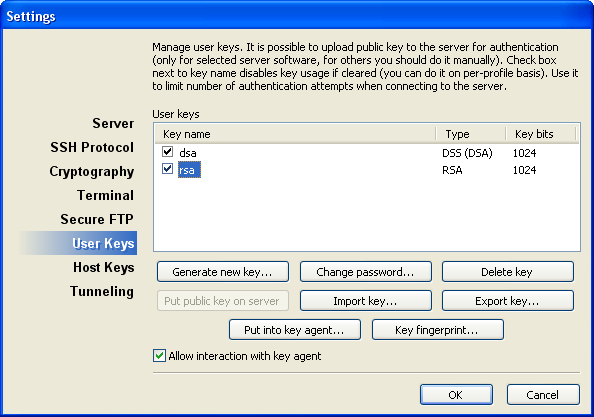
- Once you create the keys, you get a picture similar to the one below
Upload public key to the server
- Connect to your server using password authentication
- On the File menu click Settings...
- Choose User keys settings
- Select "dsa-key" and click Put public key on server
- Select "rsa-key" and click Put public key on server
- Click OK
- On the File menu click Disconnect
Connect to the server using public key authentication method
- On the File menu click Connect...
- Set the Authentication method to Public key
- Click OK
|